Bug Craft: Window Wings
Science and Art have always gone hand in hand. Da Vinci was a painter, mathematician, musician, scientist and inventor! Many universities have a College of Arts & Sciences. You need to be curious, flexible and dedicated for a career in either. Here at Bug Chicks HQ, we blend our love of both regularly! Jess draws awesome illustrations and creates props for teaching and I bring my theater skills to our videos and design bug costumes with moving parts. Obviously, we both use our entomology backgrounds every day.


In honor of Art & Science being BFFs, we're going to start a little series of Bug Crafts!
Today we will show you how to use puffy paint/glass paint to make cool scientifically accurate inset-wing designs on windows! We have even provided you a FREE DOWNLOADABLE insect wing designs! We chose the sand wasp, Bembix americana antilleana. Download sand wasp right and sand wasp left.
Supplies you will need:
printed wing tracing sheet (right, left or both)
black puffy paint
scotch tape
colored glass paint or puffy paint
a clean glass surface
Step 1: Clean your windows

Dirty windows make for ugly bug wings. (Full disclosure: We only cleaned the windows we were working with. Those dawgs are BIG! Don't judge. It's The Bug Chicks way.)
Step 2: Decide on your pattern and tape it up
We used the left wings on the right side of the window and the left on the right side. Tape them up on the outside of the glass. Expert tip: We suggest doing this craft on a day when there is no precipitation. We made this craft in between two hail storms. It was stressful.


Step 3: Trace with puffy paint

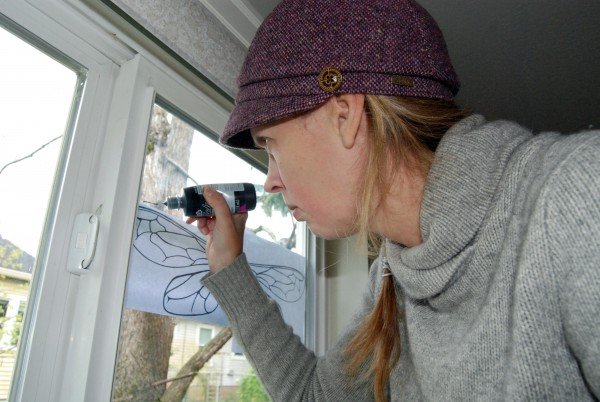
Our windows are double paned, so we had to close one eye in order to trace the lines effectively. We're not making this up. Expert tip: Go left to right and top to bottom. Otherwise it's easy to smear the paint. Also, you might find it helpful to stabilize your hand. If you mess up, simply wipe off the paint and try again. We did A LOT of that.
Step 4: Paint with glass paint
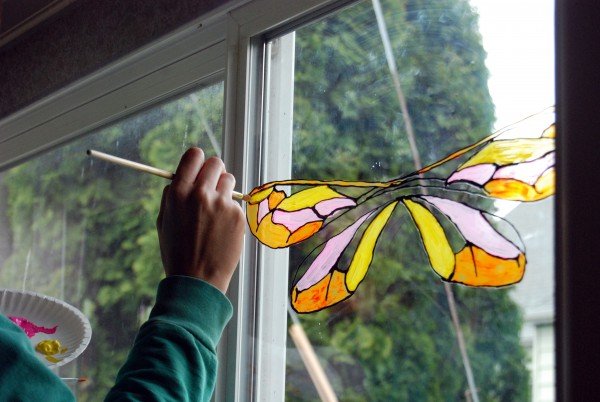
We also used a set of wings on another window as an experiment in using colored paints, to make it look like stained glass! After the puffy paint dried overnight, we used three colors of glass paint to fill in the wing cells. We love it! Expert tip: Just paint over the black puffy paint. Then use a Q-tip to clean it up. It's easier.
About the wings:
Insect wings are made of very thin layers of a hard protein called chitin. Chitin is the main substance found in exoskeleton, but in its purest form it is clear! The lines on insect wings that create the cells or 'panels' are actually veins. Hemolyph pumps through the veins to help provide structure and strength. In entomology class, you learn about a 'generalized' wing venation. it gets more complicated as you look at different orders, families, genera and species.

Different types of insects have different wing venations and subtleties between them help scientists to determine species. For example, dragonflies have very intricate and numerous small veins, where the wasps that we are using in today's craft have far fewer veins that are much more thick. But if you look at the difference between the three wasp species we used, you can see that there is a small difference between them as well.
You should post your insect Window Wings on our Facebook Page and we'll share them! Happy Crafting!